Have you ever wondered what is the secret to good pizza dough? The kind of dough that’s soft yet chewy, with just the right balance of flavor? For many home cooks, achieving the perfect pizza dough can feel like a mystery. But fear not! This guide will take you on a journey to uncover the secrets, making it simpler than ever to create a delicious foundation for your favorite pizza toppings.
First, imagine biting into a pizza with crust so perfect, it’s like it came straight from a wood-fired oven. Next, picture how versatile and rewarding it would feel to master this skill at home. Whether you’re whipping up a classic Margherita or experimenting with bold new flavors, the perfect dough makes all the difference. So, grab your apron and let’s dive into the techniques and tips that will elevate your pizza game. You’ll be a dough master in no time!
Key Elements of Perfect Pizza Dough
The role of flour and hydration levels
Flour is the foundation of pizza dough, and choosing the right type is crucial. All-purpose flour works, but bread flour, with its higher protein content, creates a chewier texture. Hydration levels also play a big role in determining the dough’s texture and elasticity. A dough with more water will be softer and easier to stretch, while a lower hydration level makes it firmer and crispier. Striking the right balance depends on personal preference and the desired crust style.
Types of Flour and Characteristics for Pizza Dough:
| Type of Flour | Protein Content | Best For | Hydration Range |
|---|---|---|---|
| Bread Flour | High (12-14%) | Chewy, stretchy crust | 65-70% |
| All-Purpose | Medium (10-12%) | Softer, versatile crust | 60-65% |
Mastering the balance of flour type and hydration is a major step toward discovering what is the secret to good pizza dough!
Importance of yeast and fermentation
Yeast is the powerhouse behind pizza dough, transforming a simple mixture into a fluffy, flavorful masterpiece. Active dry yeast and instant yeast are the most common choices, and both deliver great results when used correctly. The secret lies not just in the yeast itself but also in the fermentation process. Allowing your dough to rest for a few hours—or even better, overnight—unlocks complex flavors and an improved texture.
Fermentation works by giving yeast time to feed on the sugars in the dough. This process creates carbon dioxide bubbles, which make the dough rise and result in a light and airy texture. Cooler, longer fermentation yields a more robust flavor, while quicker fermentation produces a milder dough.
Fermentation Insights:
| Duration | Flavor Profile | Dough Texture |
|---|---|---|
| 4-6 hours | Mild | Soft and stretchy |
| 12-24 hours | Deep, complex | Airy and flavorful |
| Refrigerator (48 hrs) | Intensely rich | Light with great chew |
Unlocking the perfect dough flavor takes patience, but it’s well worth the wait!
Techniques for Kneading and Stretching
Achieving the ideal Pizza dough texture
Kneading pizza dough is more than a simple process—it’s an art form. It’s during kneading that the gluten structure develops, giving the dough its strength and elasticity. A well-kneaded dough should feel smooth to the touch and spring back when pressed lightly. If the dough is sticky, sprinkle a little flour on your hands and surface, but be careful not to overdo it as too much flour can make the dough dry and tough.
Typically, kneading by hand takes about 8-10 minutes, while using a mixer can reduce this time to around 5 minutes. The key is consistency—too little kneading leaves the dough weak, while over-kneading can make it overly dense.
Checklist for Perfect Texture for Pizza Dough:
- Smooth surface without cracks or tears.
- Elastic and slightly bouncy when pressed.
- Does not stick excessively to hands or surfaces.
Consistency is king when creating the perfect base for your pizza!
How proper kneading affects elasticity
Proper kneading is essential for achieving elasticity, the quality that allows dough to stretch without tearing. This elasticity is crucial when shaping the dough into a circle or rectangle. Without it, the dough could tear or break, making it difficult to handle. Kneading strengthens the gluten network, which acts like a net, holding the dough together.
Steps to Improve Elasticity:
- Push and Fold Technique: Use the heel of your hand to push the dough away, then fold it back toward you.
- Rotate the Dough: Turn the dough slightly after each push to ensure even kneading.
- Rest Periods: If the dough becomes too tight, let it rest for 5–10 minutes before continuing.
Consistency and proper handling will ensure your dough is perfectly elastic for shaping!
Temperature and Resting Times
Why resting improves pizza dough consistency
Resting is one of the most underrated steps in dough preparation. When you let dough rest, you allow the gluten to relax, making it easier to stretch and shape. At the same time, the yeast continues to work, creating tiny bubbles of carbon dioxide that give the dough its airy structure.
Short rests of 1-2 hours are sufficient for quick pizza recipes, but for the best results, consider resting the dough overnight. The longer the dough rests, the deeper the flavor and the more refined the texture.
Resting Benefits at a Glance:
| Resting Period | Outcome | Recommended Use |
|---|---|---|
| 1-2 hours | Basic texture | Quick pizza recipes |
| 8-12 hours | Enhanced flavor | Intermediate dough |
| 24-48 hours | Maximum flavor depth | Gourmet-quality pizza |
The secret to good pizza dough often lies in this patient resting process!
The impact of temperature on flavor development
Temperature is a critical factor in pizza dough preparation. Yeast thrives in warm environments but works more slowly in cooler ones. By controlling temperature, you can fine-tune the dough’s flavor profile and rise time. For example, a warm kitchen accelerates fermentation, creating a softer texture, while refrigeration slows the process, resulting in more complex flavors.
Temperature Guidelines:
- Lukewarm Water: Ideal for activating yeast.
- Room Temperature: Speeds up rise time but requires close monitoring.
- Refrigerator: Perfect for slow, flavor-rich fermentation.
Managing temperature effectively allows you to craft a dough that’s flavorful and easy to work with!
Enhancing Pizza Dough Flavor
Benefits of adding olive oil and salt
Adding olive oil and salt to pizza dough is like giving it a personality boost. Olive oil enriches the dough, making it softer and more flavorful, while salt enhances the natural flavors and improves gluten structure. Together, these ingredients create a dough that’s not only tasty but also easier to handle.
Key Enhancements:
| Ingredient | Benefit | Impact on Dough |
|---|---|---|
| Olive Oil | Softens and enriches | Flexible, flavorful dough |
| Salt | Boosts flavor, strengthens gluten | Structured dough |
Incorporating these two ingredients adds depth and character to your pizza dough!
Using natural fermentation for depth of flavor
Natural fermentation, such as using a sourdough starter, takes your dough to a whole new level. Unlike commercial yeast, natural fermentation develops a unique tanginess and a chewy texture. Although it takes longer, the end result is a pizza crust that stands out.
Advantages of Natural Fermentation:
- Unique Flavor: Tangy and complex.
- Better Texture: Chewier and more elastic.
- Health Benefits: Easier to digest due to longer fermentation.
For pizza lovers who want the ultimate flavor, natural fermentation is the way to go!
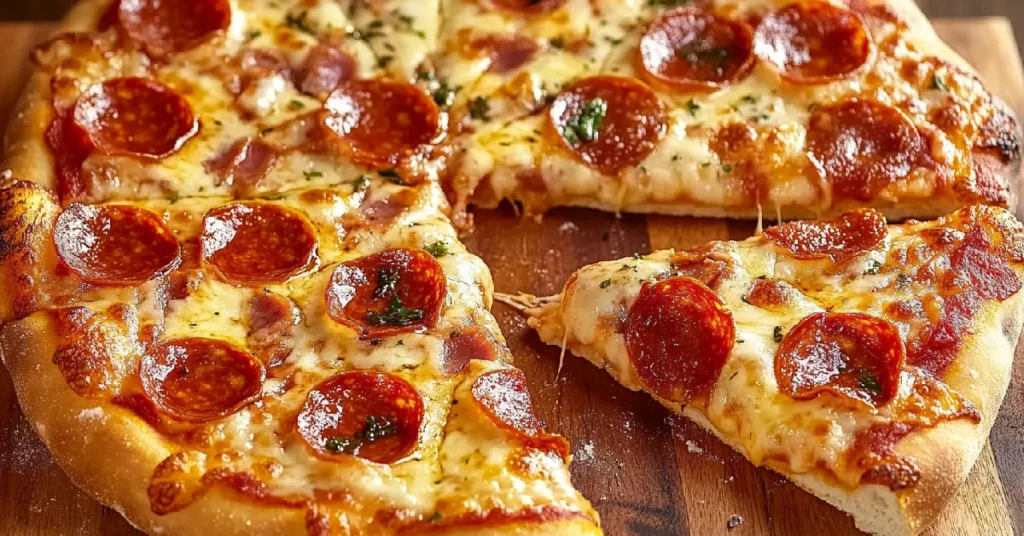
Now that you know the secrets to perfect pizza dough, it’s time to roll up your sleeves and create something truly delicious—starting with a classic favorite: pepperoni pizza!
Ingredients
- 16 ounces pizza dough – This flexible base sets the stage for your delicious pizza. Whether homemade or store-bought, the dough brings a chewy yet crispy texture. Rolling it out is like opening a blank canvas for your toppings!
- 1/2 cup pizza sauce – Bursting with tangy tomato goodness, this sauce is the heart of your pizza. Add some homemade love with a quick stir of spices and olive oil, and you’ve got magic.
- 18 to 20 slices pepperoni – These sizzling, spicy slices are the star! They add smoky, savory flavors to every bite. For extra pizzazz, try layering some under the cheese for a delightful surprise.
- 12 ounces mozzarella cheese – Ah, the melty goodness! This cheese ties everything together, delivering gooey, stretchy perfection with every bite.
- 1/2 teaspoon ground black pepper – A dash of boldness never hurts. Black pepper enhances every topping, adding just the right kick to your pizza.
- 1 teaspoon fresh oregano (optional) – For an herbaceous flair, fresh oregano elevates your pizza to gourmet status. Sprinkle it over the finished pie for a fragrant finish.
- Flour for rolling – A sprinkle of flour keeps your dough from sticking and helps you achieve that perfect crust.
Step-by-Step Instructions
- Preheat the oven to 500°F – Start strong by getting your oven piping hot. If you’re using a pizza stone, give it 20 minutes to heat up for the crispiest crust.
- Make the sauce – Mix tomato sauce, salt, pepper, garlic, onion, red pepper flakes, and olive oil. This quick blend is packed with flavor, ready to shine on your pizza.
- Roll out the dough – Dust your counter with flour and roll out the dough into a 14-inch circle. If it’s stubborn, let it rest for 5 minutes to soften up.
- Add the toppings – Spread the sauce evenly, leaving a 1/4-inch crust around the edge. Layer half the pepperoni, sprinkle the mozzarella, and finish with the rest of the pepperoni.
- Bake the pizza – Slide it onto the pizza stone or place it in a cast iron skillet. Bake for 10-12 minutes, rotating halfway for even cooking. You’ll know it’s ready when the crust turns golden and the cheese bubbles.
Serving
- This recipe serves 4 to 6 people, depending on how hungry they are.
- Slice your creation into wedges and serve warm. Enjoy it as is, or pair it with a fresh side salad or crispy breadsticks for a complete meal.
- Optional garnish? A sprinkle of fresh oregano or a drizzle of olive oil takes it to the next level. Feeling adventurous? Add a side of honey butter for dipping your crusts.
What to Serve with pepperoni pizza
- recipes1: tagline
- recipes2: taglinw
Tips and Hacks
- For an ultra-crispy crust, preheat your pizza stone for 30 minutes instead of 20.
- Layer some pepperoni under the cheese for a smoky, melty surprise.
- Want a vegetarian option? Swap pepperoni for roasted bell peppers or mushrooms.
- Leftovers? Store in an airtight container and reheat in the oven to maintain the crispy crust.
Nutrition Facts
- Serving size: 1 slice (1/8 of pizza)
- Calories: 270
- Fat: 12g
- Carbs: 29g
- Protein: 14g
- Sodium: 620mg
- Fiber: 2g
Please note: These values are estimates and may vary based on ingredient brands, portion sizes, or preparation methods.
Prep Time
- Prep time: 15 minutes
- Cook time: 12 minutes
- Total time: 27 minutes
Please note: Times are approximate and may vary depending on your kitchen setup.
Frequently Asked Questions (FAQs)
The trick to pizza dough is in the kneading and resting time! First, make sure to knead the dough for about 8-10 minutes. This helps develop the gluten, giving your dough a chewy texture. Also, let it rest for at least an hour. The longer the dough rests, the better it rises, and that makes your pizza dough soft and light. Trust me, you’re going to love this!
Pizza dough tastes better when you let it rise slowly! First, give it time—let it rest in the fridge for a few hours or overnight. This process develops more flavor. Also, try adding a little olive oil to the dough. It makes the crust a bit richer and gives it a delicious flavor. Trust me, these simple tricks make all the difference in your pizza!
Pizza dough tastes better when you let it rise slowly! First, give it time—let it rest in the fridge for a few hours or overnight. This process develops more flavor. Also, try adding a little olive oil to the dough. It makes the crust a bit richer and gives it a delicious flavor. Trust me, these simple tricks make all the difference in your pizza!